The layout is defined in the same way for version reports and line reports. The following instructions relate to a version report.
What is layout?
On the following printout, all text marked with blue is the information you define in the report layout.
Printout example

- Select the Work with reports menu item.
- On the main panel, select the applicable version report and click Layout.
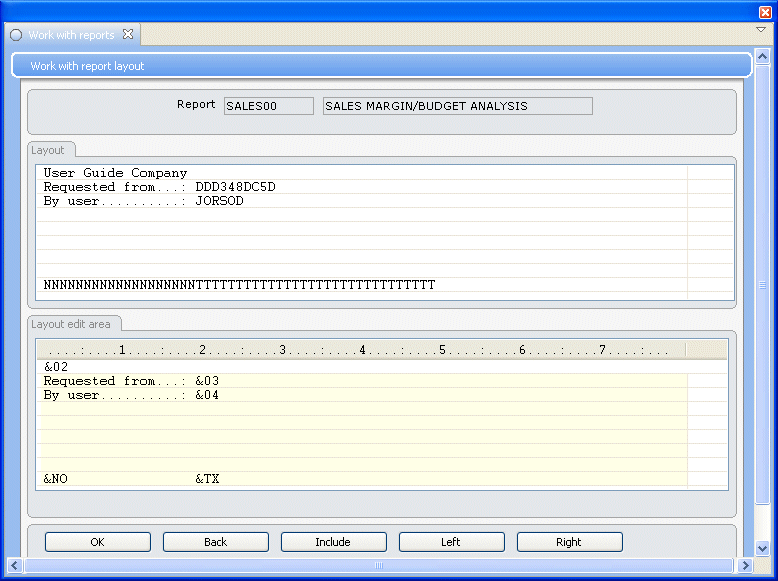
- You access Work with report layout. When you first access this panel for a new report, it is empty. The panel is divided into two parts. In the upper part of the panel, you will see the result of what you define in the bottom part of the panel. In the bottom part of the panel (the layout edit area), you have nine lines at your disposal. On the first eight lines, you can enter either text of your own, or layout codes.
- You remain on the same panel which is now updated. In the upper part of the panel you will now see the result of entering layout code 02.
- column identities
- key field code
- key field text
- Customer number
- Item code
- Item group
- Customer number
- Country
- Customer group
- 189602 and 170500 (key Customer number)
- IT and SE (key Country)
- C1 (key Customer group)
- Customer name (connected to key Customer number)
- Item description (connected to key Item code)
- Item group description (connected key to Item group)
- Customer number
- Country
- Customer group
- Casa Frederica (key Customer number)
- Italy and Sweden (key Country)
- Customer – Domestic (key Customer group)
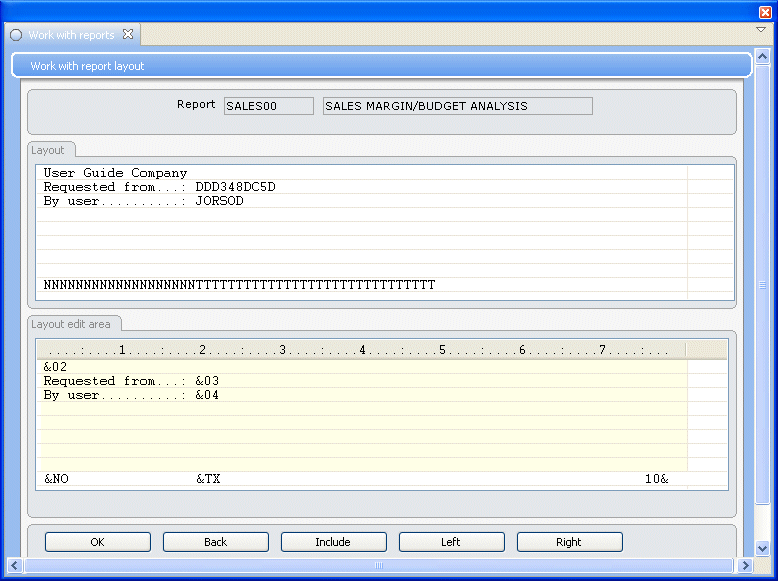
- As previously described, the result of the information you enter in the bottom part of the panel, should be shown in the upper part of the panel. Since you now entered the code for Key field code (&NO) and Key field text (&TX), the result should be shown in the upper part of the panel, which is not the case. This is because the upper part of the panel only displays the first six lines from the bottom part of the panel.
- You access the same panel again, with the result in the upper part of the panel:
- You access the panel again:
- You access the same panel again, now starting in position 60:
- You access the same panel again, now starting in position 120:
- You access the result of the last right part of the panel:
Layout codes
Layout codes are predefined codes from Work with layout code texts. This program is loaded when the system is installed. To see all existing layout codes, press F4 or click the prompt when the cursor is placed on any of the first eight lines in the bottom part of the panel.
When you enter a layout code in the bottom part of the panel, it must be preceded by the character &. When you click OK, the system will retrieve the corresponding text for the layout code and show the text in the upper part of the panel.
Manual text
You can also enter text manually in the bottom part of the panel. The text will be shown in the upper part of the panel after clicking OK.
Note: The text is static, which means that, regardless of what selection parameters you choose when you print the report, the text will not be changed.
Moving left/right
On this panel you can only see the first 78 characters, counted from left. A ruler is shown in the middle of the panel, dividing it into the two parts. The ruler starts in position 1. The figure 1 on the ruler means 10 (position 10), figure 2 means 20, etc. Each dot represents 1 position and each colon (:) represents 5 positions.
If you print a report in landscape format, then you might want to use up to 198 positions (normal limit for landscape format) when you define the layout.
You can position the text to the right or left on the report. Click Right, alternatively Left to position the text where you want it.
Define the layout
For your information an extract of the printout is shown below:
Printout example

This is the text shown on the upper, extreme left of the report.
On the first line (DC1 Demo Company), the layout code 02 is used. Layout code 02 retrieves the Company name from Work with companies.
On the second line (Requested from…: QPADEV0005), both manually entered text and the layout code 03 is used. The manually entered text is Requested from…:. Layout code 03 retrieves the Workstation ID (QPADEV0005) of the workstation from which this report is ordered.
On the third line (By user………..: DC1), also both manually entered text and a layout code (layout code 04) is used. The manually entered text is By user…………:. Layout code 04 retrieves the User ID (DC1) of the person who ordered a printout of the report.
What to do?
To define the first line of the layout, do as follows:
Enter &02 on the first line, to the extreme left, in the bottom part of the panel. Click OK.
To define the second and the third line of the layout, as exemplified here by Requested from…: and By user…………:, do as follows:
Enter Requested from…: &03 on the second line, to the extreme left, in the bottom part of the panel.
Enter By user…………: &04 on the third line, to the extreme left, in the bottom part of the panel. Click OK. You now see the result in the upper part of the panel.
Ninth line
The ninth line in the bottom part of the panel is reserved for:
Column identities
To define which columns should be shown on the report, enter the column number on the last line in the correct position. See step 9 below.
Note: The column number must end with the character &. Otherwise, the system will not recognise the figure as a column number. If you, for example, want to include column number 10, enter 10&.
Key field codes
The Key field code is only used for reports of type 1 (version report). See About working with versions for further information.
If you want to include the key field codes on a report, enter &NO on the ninth line on the report layout panel. When the report is printed, the key field codes defined in the report version are retrieved, and shown on the printout.
Key field codes are the records in Work with system statistic key definitions. Examples of key field codes are:
Example:
In this example the version selected for the report is defined with the following statistics keys:
which means that the report is shown, and summarised, on these three levels. For your information an extract of the printout is shown below:
Printout example
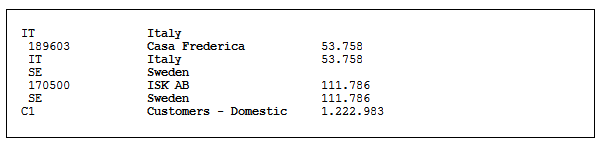
As you see, the sum is shown for each customer (189603 and 170500), for each country (IT and SE) and for each (in this example, there is only one) customer group (C1).
In this extract the key field code (&NO) has retrieved the following statistical keys:
It is the report version that controls which keys are printed on the report. For more information about versions, see About working with versions.
Key field texts
The Key field text is used both for report of type 1 (version report) and 2 (line report).
For reports of type 1, as in this example, the key field text is the text connected to the key field. For reports of type 2, the key field text is the text defined for the line. See Define an item line for further information.
If you want to include the key field texts on a report, enter &TX on the ninth line on report layout panel. When the report is printed, the key field texts, corresponding to the keys defined in the report version, are retrieved and shown on the printout.
The key field text is connected to the keys in Work with system statistic key definitions. Examples of key field text are:
Example:
In this example, the version selected for the report is defined with the following selected statistics keys:
which means that the report is shown, and summarised, on these three levels. For your information an extract of the printout is shown below:
Printout example
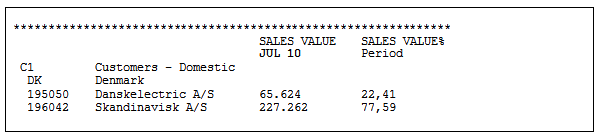
As you see, the sum is shown for each customer (Casa Frederica and ISK AB), for each country (Italy and Sweden) and for each (in this example there is only one) customer group (Customers – Domestic).
In this extract the key field text (&TX) has retrieved the following key text for the statistical keys:
It is the report version that controls which keys and key texts are printed on the report. For more information about versions, see About working with versions. For more information about lines, see About working with report lines.
What to do?
In this example, both the key field codes, and the key field text connected to the keys, are shown on the report printout, e.g., both the customer number and the customer name.
Tip: You do not have to include both the key field codes and key field texts on the report. If you want to save space on the report printout, you can select only to show the key field codes or key field text.
Do as follows to include both the key field codes and key field texts on the report printout:
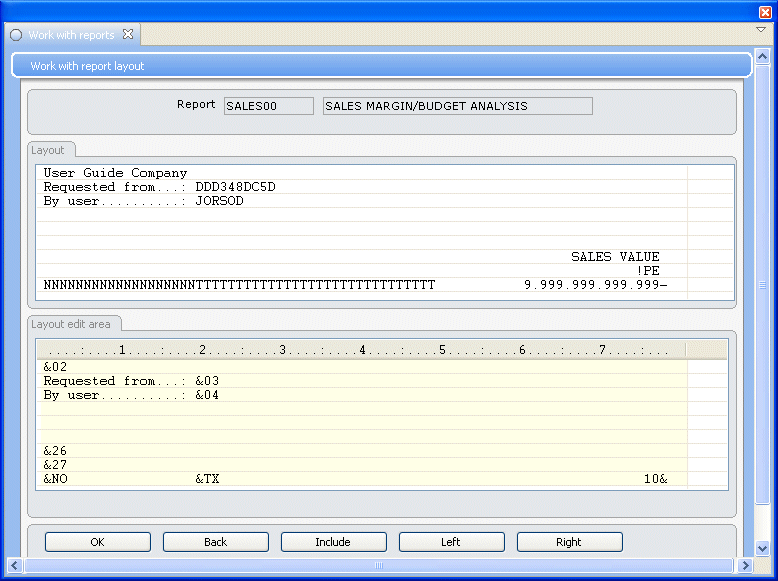
Enter &NO on the last line, to the extreme left. Place the cursor 12 positions to the right and enter &TX (this is in position 15 – see the ruler).
Click OK.
To see the result, use the scroll bar to see the remaining three lines in the upper part of the panel, as illustrated below:
Panel image
Now, you see the result of the code &NO (NNNNNNNNNNNNNN) and &TX (TTTTTTTTTTTTTTTTTTTTTTTTTTTT) in the upper part of the panel.
Note: Since the system does not know what version you will use when this report is printed (the version contains information about the Key field codes and Key field texts), you cannot see any actual values on this panel. This is why NNNNNNNNNNNNNN and TTTTTTTTTTTTTTTTTTTTTTTTTTTT are shown instead.
When the report is printed, the system will retrieve the key field codes, and corresponding text, defined in the version selected for the report.
Columns
On the ninth line in the bottom part of the panel you also define which columns should be shown on the report. This is done by entering the column number and the end character &.
What to do?
To define the first column on the report, enter 10& in position 59.
Note: The &-character decides the position, i.e., that this character should be entered in position 59. Also note that this character should be entered in the end, not in the beginning which is the case for layout codes and key field/text codes.
This is shown below:
Panel image
Click OK.
Panel image
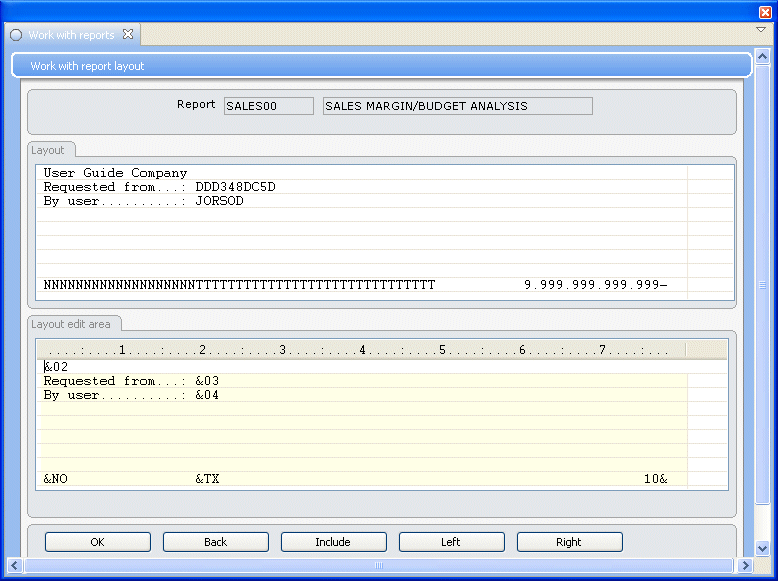
The result of this column is shown as 9.999.999.999.999, since this column contains an amount and is defined with edit code 22 (see Define actual value columns.
Column headings
If you defined two column headings for each column for this report, then when defining the layout on this panel, you can retrieve one, or both, column headings by entering the layout code for Column heading 1 and/or Column heading 2. See About working with columns for more information.
In this example, you should include both Column heading 1 and Column heading 2.
Enter &26 on the seventh line and &27 on the eighth line, both to the extreme left.
Click OK.
Panel image
In the upper part of the panel, both Column heading 1 (SALES VALUE) and Column heading 2 (
Column heading 2 will be exchanged with the period selected when the report is printed. See the extract of the report printout below:
Printout example
On this printout the Column heading 2 text (
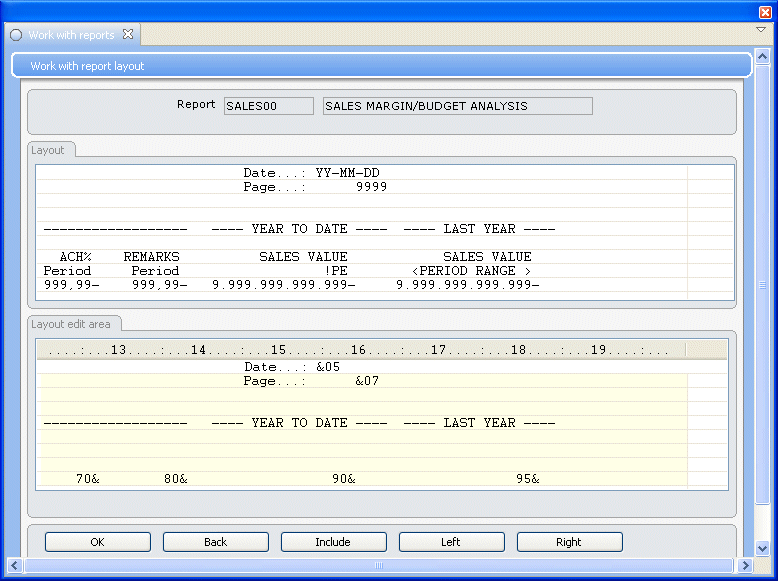
Remaining layout
Complete the panel as shown below to define the report layout as shown in the introduction above:
Panel image

Click Right to continue to define the layout for the right part of the report.
Panel image
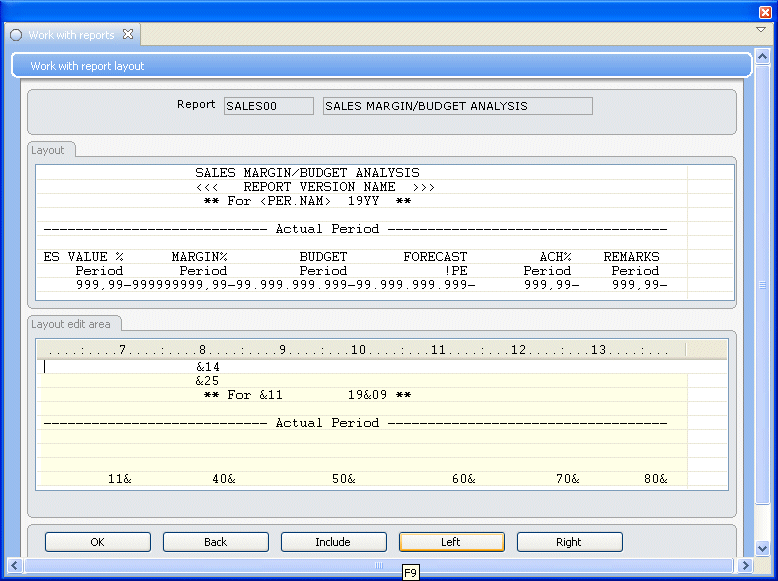
Complete the panel as shown above.
Click Right again to complete the last part of the report layout.
Panel image
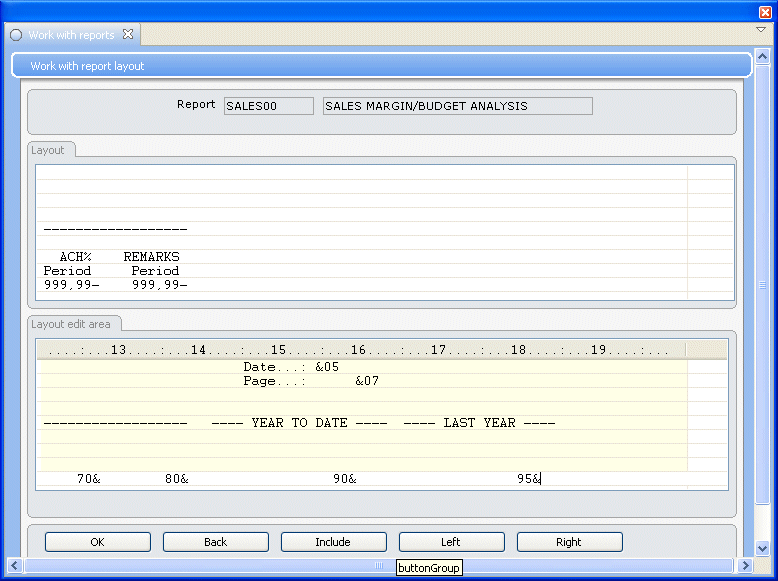
Complete the panel as shown above. Click OK.
Panel image
Use the scroll bar in the upper part of the panel to see the first six lines.
Click OK again to update and return to the initial panel. Caution: This is important. If you click Back (F12), then the information will not be updated.